This article is the operator's manual for the JUCY NZ Condo Gen2 campervan. It covers starting the vehicle, windows and vents, the 240-volt and 12-volt electrical systems, fresh water, grey water, water pump, toilet, tap and sink, gas stove, fridge, lights, dining table, power points, bottom and top bed setup, storage, fuel, jack and spare tyre, and dashboard warning lights.
Need-to-know
- Fuel type: Check the fuel sticker located on the fuel door or fuel cap. Review the rental agreement for specific fuel requirements.
- Daily drive time: Drive regularly to keep the domestic battery charged via the alternator. Plug into external power every second night to maintain the domestic battery via the 240-volt system.
- Water pump: Must be switched on via the 12-volt panel to use the tap. Turn off when not in use. Do not run the pump when the water tank is empty.
- Tap water is not suitable for drinking unless boiled first.
- Gas stove: Built-in LPG stove. Not designed for use with pans larger than 20cm. Turn off the gas valve when not in use. Leave lid open after use to cool. Always ventilate the vehicle while cooking.
- Toilet: Cassette toilet - must be emptied and cleaned before returning the vehicle to the depot.
- Tyre size: 195/R15, 50 PSI.
- Oil / coolant: 10W40 engine oil. Red coolant (any brand). Do not mix coolant colours.
- Emergency contact: JUCY Roadside Assistance - call for overheating, oil pressure warning, brake/ABS warnings together, or any red dash light.
- Red dash light rule: Red = stop safely and call Roadside Assistance. Amber = drive cautiously and report.
1. Description of keys
Ignition key: Use this key to start your vehicle.
Fresh water key: Use this key to lock/unlock the freshwater tank cap.
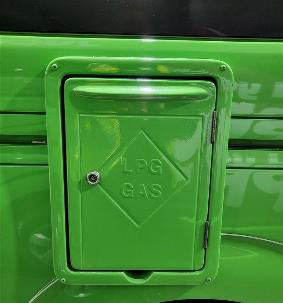
Gas locker key: Use this key to lock/unlock the gas locker.
2. Fire extinguisher
Each vehicle is equipped with a dry chemical fire extinguisher, selected to address both Type B fires (grease and liquids) and Type C fires (electrical). A fire extinguisher is attached to the interior of the vehicle, behind the back seats.
To deploy the extinguisher:
- Grasp the ring at the top of the bottle.
- Direct the nozzle towards the base of the flames.
- Press the lever down firmly.
- Guide the nozzle from side to side across the base of the flames.
3. Starting the vehicle
The gear stick must be in PARK and your foot on the brake pedal in order for the vehicle to start.
- The dashboard will display a 'P' indicating that the vehicle is in park.
- Start the vehicle using the ignition key.
- With your foot still on the brake pedal, pull the gear stick down into the 'D' position. The dashboard will display a 'D' indicating drive.
- To disengage: Grip the handle and feel for the button under your finger. Squeeze the button, then turn the handle anticlockwise. The handle will be released and can be pushed away from you towards the floor.
To engage: Grip the handle and pull it towards you.
Please note: The handbrake is located below the gear stick.
4. Windows and vents
Windows:
To use the window, unlock from the middle latch and push the window to the right.
Vents:
- Option 1: Push the button, grab the rail, and pull it towards yourself to open. The vent has a mosquito net and a sun blackout blind. To use the mosquito net, pull the blind to the left using the handle indents. To use the sun blackout blind, pull the blind to the right using the handle indents.
- Option 2: Turn the knob clockwise to open the vent. Turn the knob anticlockwise to close the vent.
5. 240-volt electrical system
To run the microwave, power points, and to recharge the domestic battery, connect the vehicle's 15AMP electrical cord to a 240-volt external power source. These items will only work when plugged into power.
To use the 240-volt electrical system:
- The 240-volt external plug is located on the driver's side of the vehicle. Connect the cord to the vehicle and to the external power source.
Note: It is recommended that the vehicle is plugged into power every second night to keep the domestic battery charged.
6. 12-volt electrical system
Your vehicle has two batteries - one for the engine and one for domestic functions.
The domestic battery operates the water pump, fridge, interior lights, and radio. It is charged by the alternator when the vehicle is being driven and by the 240-volt system when plugged into an external power source.
The 12-volt electrical panel is located beside the rear seat on the driver's side of the vehicle.
7. Fresh water tank
The vehicle has an onboard freshwater system consisting of a water pump and freshwater tank. The water tank has an 80L capacity and is located on the passenger side of the vehicle. This water is for the sink tap.
To fill the freshwater tank:
- Flip open the compartment marked "Fresh Water Only".
- Place the end of the water hose into the tank and connect the hose to the tap to fill with fresh water.
Important tips:
- Do not use too much pressure - the tank must be vented while filling.
- If you get an air bubble, remove the hose, reinsert it, and fill slowly again.
- The tank is full when water starts to overflow from the water inlet.
Note: The water from the vehicle tap is not suitable for drinking.
8. Grey water tank
The grey water holding tank collects wastewater from the kitchen sink. Note: the grey water level indicator may give an inaccurate reading and show 100% even when empty. Empty the grey water tank as regularly as possible.
To empty the grey water tank:
- Collect the grey water hose from the storage compartment.
- Connect the hose to the outlet. Make sure it is firmly attached.
- Place the other end of the hose into a dump station disposal opening.
- Open the tank by pulling the lever located at the base of the rear cabinet, or on the rear undercarriage on the passenger side of the vehicle. Wait for it to empty.
- Once the grey water is empty, close the lever, remove the hose, and stow it away in the storage compartment.
9. Water pump
- Ensure there is water in the freshwater tank.
- On the 12-volt panel, turn the water pump on. You will hear the pump quietly start up. The pump operates as part of the 12-volt system and must be on to operate the kitchen tap.
- When you are not using the water pump, ensure it is turned off.
Note: Avoid running the pump when the water tank is empty. Operating the pump continuously with no water can cause damage.
Caution: Do not drink the water from the tap unless it has been boiled first.
10. Toilet
It is highly recommended to regularly empty the toilet cassette. It is mandatory to empty and clean it before returning the vehicle to the depot.
To use the toilet:
| 1. Turn the water pump on via the domestic panel. | |
| 2. To add water to the bowl, press the blue button on top of the toilet. | |
| 3. To flush, use the grey lever on the bottom right-hand side or in the middle in front of the toilet bowl. Push to the side to open the trapdoor into the cassette, and pull back to close. |
To empty the toilet:
- Open the toilet cassette door on the right side of the vehicle by pressing both buttons on the door at the same time.
- Lift the yellow or blue tab and remove the cassette.
- Twist off the yellow/blue cap at the twisting arm and pour waste into a dump station.
- Pull the cassette out to be emptied at the designated dump station.
11. Tap and sink
The vehicle comes equipped with a pressurised water system.
To use the tap:
- Turn on the water pump using the button on the control panel.
- You will now be able to turn the tap on.
12. Gas stove
The vehicle is equipped with a gas stove. This stove is not designed for use with pans larger than 20cm.
To use the gas stove:
- Unlock the LPG storage area located outside the vehicle. Turn the gas valve anticlockwise to open it. Turn it slowly and carefully - you should feel the valve loosen as you turn.
- Press the ignition button on the stove. Turn the knob to allow the gas to flow, while pressing the ignition button until the flames light.
- Hold the button for a few seconds, then release.
- Adjust the flame to your desired level.
- After using the stove, leave the lid open to allow it to cool.
Caution: Always have the vehicle well-ventilated while using the gas stove. Do not leave the gas valve on when not in use.
13. Fridge
The fridge operates via the 12-volt and 240-volt system.
To use the fridge:
- Turn on the fridge switch on the control panel.
- Check that the light is illuminated on the fridge above the power button - this indicates the fridge is on and working.
- The thermostat can be found inside the fridge. The optimal range is halfway between the minimum and maximum temperature settings.
Note: If the vehicle is not plugged into mains power and is left stationary for an extended period, leaving the fridge on could drain the domestic battery.
14. Lights
The vehicle is equipped with cabin lights.
To use the cabin lights:
- Press the required light button on the main control panel.
- To turn the lights on, gently press the circle indent button.
Outside light: To operate the outside light, flick the orange button located above the sliding entry door. It will illuminate.
15. Dining table
Outside dining:
The vehicle is equipped with an outside table connected to the kitchen cabinet. To set up, unhook the elastic clip and extend the table leg.
Inside dining:
The vehicle also has an inside dining table. To set up, place the table mounts (Diagram A) into the mounting brackets (Diagram B).
16. Power points
The vehicle is equipped with 2 power points located next to the driver's side rear seat. These will only work when the vehicle is plugged into an external power source.
The vehicle is also equipped with USB charger ports located next to the fridge. These will work when the vehicle is plugged in and when the 12-volt control panel is turned on.
17. Bottom bed
The vehicle is equipped with 2 double beds.
To set up the bottom bed:
- Locate the small square squab on the rear-facing bench seat.
- Make sure it is firmly secured.
- Undo the black bungee strap.
- Use the strap located in the middle and pull towards the two rear seats until they are connected.
- Once connected, make sure it is fully secured to the two rear seats.
- Pull the small squab to connect to the middle squab.
- All 3 squabs should now be flat and secured.
- Place the long single squab behind the 2 front seats — pull the front seat forward and place the squab in the space.
- All squabs should be flat and firmly secured.
| 1. Locate the small square squab behind the front seats. |
|
| 2. Make sure it is firmly secured for safety reasons. | |
| 3. Undo the black elastic strap. | |
| 4. Use the strap located in the middle and pull towards the two rear seats until they are connected. |
|
| 5. Once connected, make sure it is fully secured to the 2 rear seats. | |
| 6. Place the small squab to connect to the middle squab. | |
| 7. All 3 squabs should now be flat and secured. | |
| 8. Place the long single squab behind the 2 front seats - pull the front seat forward and place the squab in the space. | |
| 9. All squabs should be flat and firmly secured. | |
18. Top bed
To set up and access the top bed:
To access the top bed, securely clip the top of the ladder into the bed frame.
- Unclip both hooks to release the bed net.
- Pull the middle tab to get the mattress out.
- The top bed is now flat and secure.
- To access the top bed, step on the rear seat. Do not step on the middle bottom squab.
- Securely place your foot on the side foot ladder, located on the right or left-hand side of the sliding door beams.
- Place your hand on the side handle to push yourself up onto the roof bed.
1. Use the foot pedal located on the side of the vehicle to assist with accessing the top bed safely. 2. Unclip both hooks to release the bed net. | |
| 3. Pull the middle tab to get the mattress out. | |
| 4. The top bed is now flat and secure. | |
| 5. To access the top bed, step on the rear seat. Do not step on the middle bed or bottom squab. |
|
| 6. Securely place your foot on the side foot pedal, located on the right or left-hand side of the sliding door. |
|
| 7. Place your hand on the side handle to push yourself up onto the roof bed. |
|
19. Storage
The vehicle has a dedicated storage area located under the middle sliding compartment of the bottom bed.
20. Fuel
To ensure you are using the correct fuel, always check the fuel sticker located on the fuel door or on the fuel cap. Additionally, review the rental agreement for the specific fuel requirements.
21. Jack and spare tyre
To access the jack tools, open the sliding door and locate the compartment on the left side. Always ensure the vehicle is parked on a stable surface before using the tools.
The spare tyre can be found on the front of the vehicle; however, in some vehicles it may be located on the back.
To access the spare tyre on the front:
- Remove the wheel cover.
- Use the wheel brace to remove the wheel nuts and release and remove the spare wheel.
To access the spare tyre under the rear of the vehicle:
- Use the wheel brace as shown.
- Unscrew the bolt located on the inside rear of the vehicle on the floor, turning anticlockwise.
- Be careful as the tyre can heave and drop when released.
Always make sure the spare tyre is securely fastened before driving.
22. Additional information
- Tyre size: 195/R15
- Tyre pressure: 50 PSI
- Oil type: 10W40
- Coolant type: Red coolant (any brand).
Note: Do not mix coolant colours - if the coolant in the vehicle is red, use red; if green, use green.
23. Dash warning lights
Warning Light Symbol | Warning light | Description | What to do |
|---|---|---|---|
| Brake warning (Red) | Handbrake engaged or low brake fluid. If shown with ABS light, brake fault. | Pull over safely and avoid sudden braking. If shown with the ABS light, stop immediately and contact Roadside Assistance. | |
| ABS warning (Amber) | ABS fault - brakes still work without ABS. If shown with brake light, possible brake failure. | If on alone, drive cautiously and check as soon as possible. If shown with brake light, stop immediately and call Roadside Assistance. | |
| Electronic Stability Control (Amber) | Traction control fault. Flashing = active; constant = fault. | Drive with caution. Restart the engine; if it stays on, contact Roadside Assistance. | |
| Power steering (Amber / Red) | Overheated or failed steering assist. | If red, take extra care steering. Pull over and contact Roadside Assistance. | |
| Airbag / SRS (Red) | Fault in airbag or seatbelt system. | Contact Roadside Assistance. | |
| Coolant overheat (Red) | Engine overheating - possible low coolant or leak. | Stop immediately and contact Roadside Assistance. | |
| Battery charge (Amber / Red) | Battery not charging. | Contact Roadside Assistance. | |
| Oil pressure (Red) | Low oil pressure or high oil temperature. | Stop immediately and contact Roadside Assistance. | |
| Engine management (Amber) | Fault with engine or emissions. | Continue to your destination, then contact Roadside Assistance. | |
| Immobilizer (Amber) | Anti-theft fault or key battery issue. | Continue driving and contact Roadside Assistance. | |
| Pre-collision system (Amber / Red) | Active intervention or system fault. | If red or faulty, check for obstructions and clean sensors. System disabled until fixed. | |
| Stop & Start (Amber) | System deactivated or fault. | Safe to drive. Contact Roadside Assistance if faulty. | |
| Parking assist sensor fault (Amber) | Dirty or damaged parking sensor. | Parking alerts disabled - clean sensors and report the fault. | |
| Radar sensor fault (Amber) | Rear cross-traffic alert disabled. | Clean rear sensors. Report if it persists. | |
| Lane departure alert (Amber) | System off or fault. | Check whether it's turned off; if faulty, contact Roadside Assistance. | |
| Tyre pressure (Amber) | Low tyre pressure or puncture. | Inflate to spec; if flat, stop and call Roadside Assistance. | |
| Collision avoidance (Amber / Red) | System active or fault. | If faulty, check sensors for obstruction. System disabled until fixed. |